Early levels feel forgiving- there's room to recover from a bad placement. Later on, boards stop giving you that room. Here's why hard levels feel so much less forgiving, and how to give yourself more space to work with.
Why Hard Levels Feel So Much More Punishing
The core rules don't change as levels get harder: you still get three unpredictable shapes per turn on the same 8×8 grid, and the game still ends the moment none of the three fit anywhere. What changes is how little margin for error a fragile board leaves you - a single careless placement can quietly cost you the space a future piece would have needed.
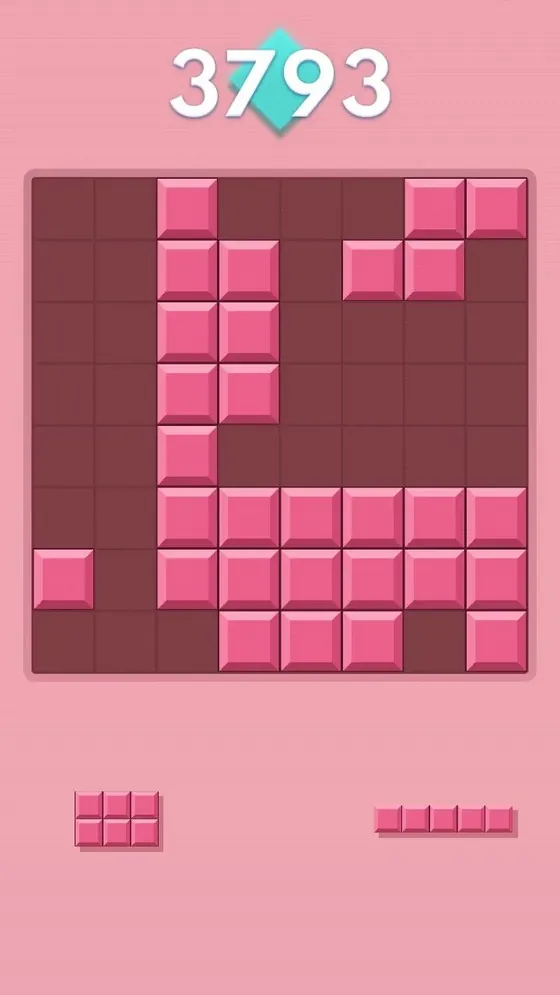
This is the same mechanic covered in Block Blast strategy and board control techniques - hard levels just remove the cushion that let early mistakes go unpunished. On an early-level board with 60% empty space, a poorly placed piece is an inconvenience. On a hard-level board that's already 75-80% full, that same placement can be the one that removes the last spot a large piece could have gone.
How to Sequence Moves on a Fragile Board
- Look at all three available shapes before placing any of them - placing the first piece without a plan can block the best spot for the second or third
- Prioritize placements that keep multiple future shapes viable, not just the one in front of you
- When a board starts looking tight, run it through the Block Blast Solver before committing to a placement - it evaluates the full board state, not just the obvious open spaces
The order you place three pieces in matters more than most players realize. If you're holding a 3x3 square, an L-shape, and a single square, placing the single square first without thinking about where the 3x3 needs to go is a common way to accidentally wall off the only open corner big enough for it. Treat the three shapes as one combined move to plan, not three separate decisions made in sequence.
What Makes a Board "Fragile" in the First Place
A fragile board isn't just one that's mostly full - it's one where the remaining open cells are scattered into small, disconnected pockets instead of one or two larger open zones. Two boards can both be 70% full and play completely differently: one with a single open 4x4 corner can still absorb almost any piece shape, while the other with the same amount of open space split into six separate 2-3 cell pockets can already be functionally dead, because nothing large fits anywhere. Hard levels don't just add more blocks faster - they make this fragmentation happen sooner, since there's less room to correct a bad placement before it starts splitting your open space.
When the Board Genuinely Has No Move Left
Some board states can temporarily have no valid solution depending on the exact three pieces you're dealt- that's normal gameplay behavior, not something unique to hard levels. See what to do when no moves are left for recovery steps.
Recovering Instead of Restarting
When a hard-level board starts looking rough, the instinct is often to keep placing pieces as fast as possible and hope for a lucky shape. That usually accelerates the fragmentation problem rather than fixing it. A better approach is to slow down for exactly the turns where the board is tightest: look at whether there's a way to consolidate your open space into one larger pocket rather than several small ones, even if it means accepting a slightly less efficient line clear this turn. A board with one open 3x4 zone can survive several more turns than a board with the same open-cell count spread across four separate corners.
If you're not sure whether a given placement helps or hurts your open-space shape, that's a good moment to check it against the Block Blast Solver rather than guessing - it's specifically built to catch the difference between a placement that looks fine and one that quietly fragments your board.
Frequently Asked Questions
Why do I lose faster on hard levels even when I'm playing carefully?
Hard-level boards leave less spare space, so placements that would have been harmless earlier can now cost you room a later piece needed. The mechanics are identical- the margin for error is just smaller.
Is there a trick to beating hard levels specifically?
Not a trick unique to difficulty- the same board-control fundamentals apply, just with less room for mistakes. Planning all three shapes together as one move, rather than one at a time, matters more the harder the level gets.
Should I use the solver on every turn during a hard level?
It's most useful once a board starts looking fragile rather than every single turn - that's when a placement a manual scan misses is most likely to cost you the run.
Does board fragmentation happen faster on hard levels?
Yes. With less overall open space to begin with, the same number of "bad" placements splits your remaining cells into smaller, less useful pockets sooner than it would on an early-level board with more room to absorb mistakes.